Git : https://github.com/Ryan-Mus/VulkanPBRRenderer
Description
A physically-based rendering engine built with Vulkan that demonstrates modern real-time graphics techniques. This application renders 3D models with realistic lighting and materials using a deferred rendering pipeline.
Features
• Modern Vulkan Implementation: Utilizes Vulkan 1.3 features including dynamic rendering and synchronization2
• PBR Materials: Full physically-based rendering pipeline supporting metallic-roughness workflow
• HDR Rendering: High dynamic range rendering with ACES tone mapping
• Image-Based Lighting: Environment map-based ambient lighting using IBL cubemaps
• Dynamic Lighting: Real-time directional and point light support with directional shadow mapping
How I made it
Vulkan Tutorial
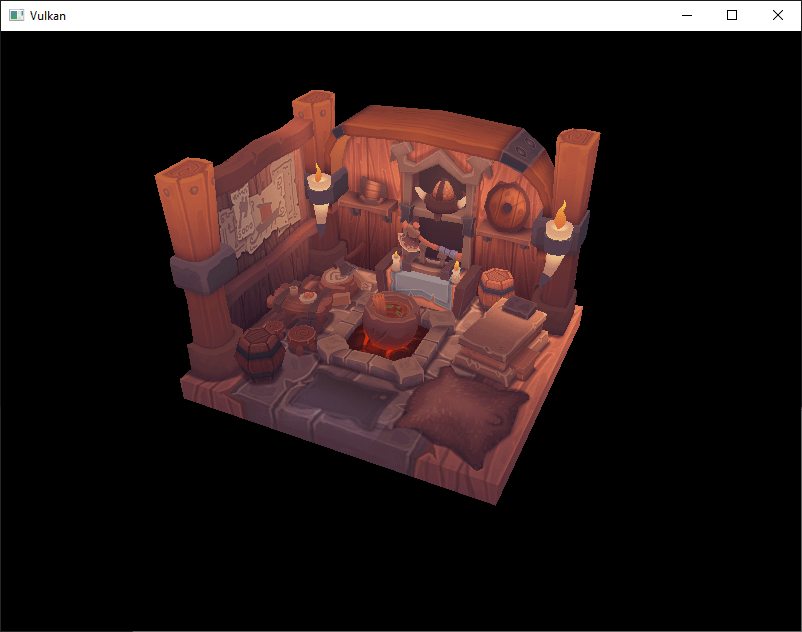
I started with the vulkan tutorial where I followed until the loading models where I ended up with this rotating viking room.
Refactoring
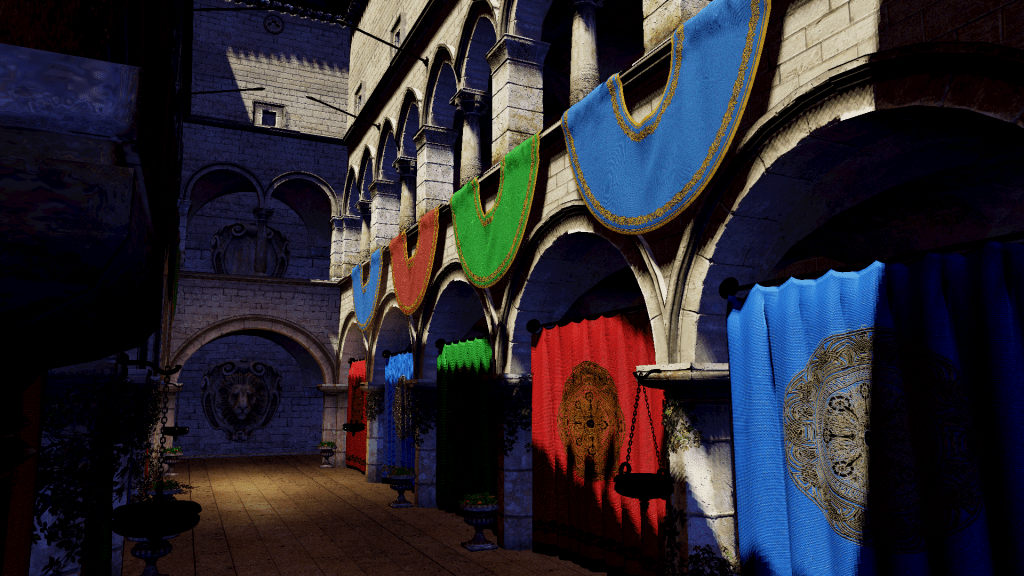
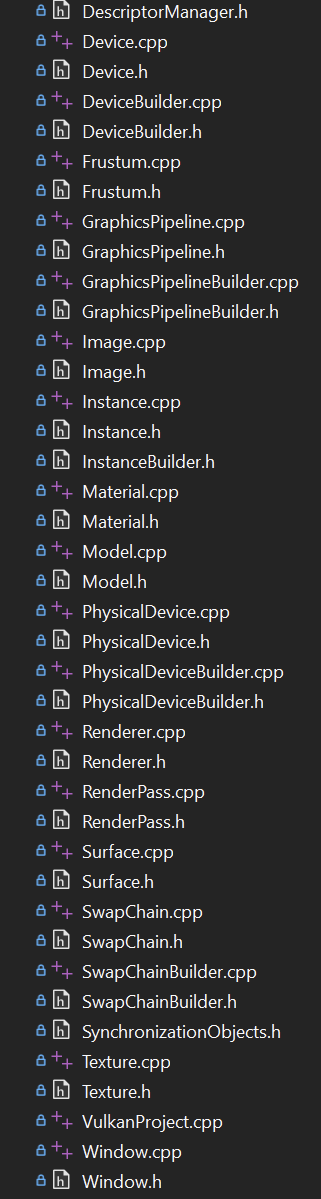
From then on, I started on my own without a tutorial. The first thing I did was try to load different models with multiple textures. I ended up using the well-known Sponza scene. At this point, the whole project was still a single file, just like in the tutorial. So, I began a big refactor that encapsulated all the Vulkan objects and made a render class that uses these objects. I updated the model loading from OBJ to glTF and made use of Assimp for the model and material loading. I used STB Image to load the textures.
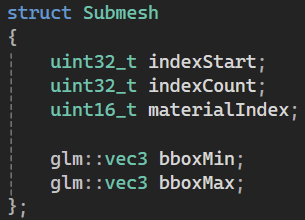
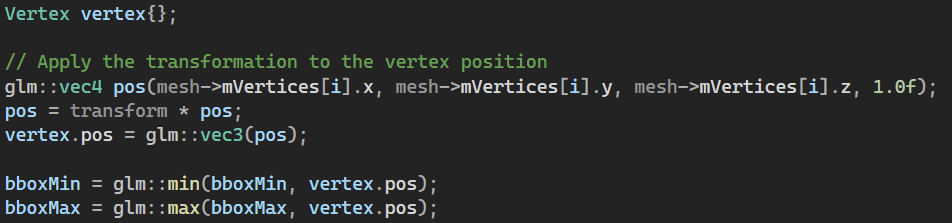
For the model, I loaded all the submeshes and calculated the Axis-Aligned Bounding Box, so I only render the submeshes that are in view.
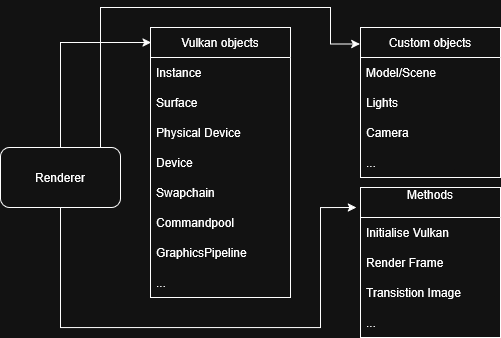
For the Vulkan objects, I mostly used the builder pattern. I used this pattern because you can easily build complex objects with different “settings.” Take, for example, the graphics pipeline.
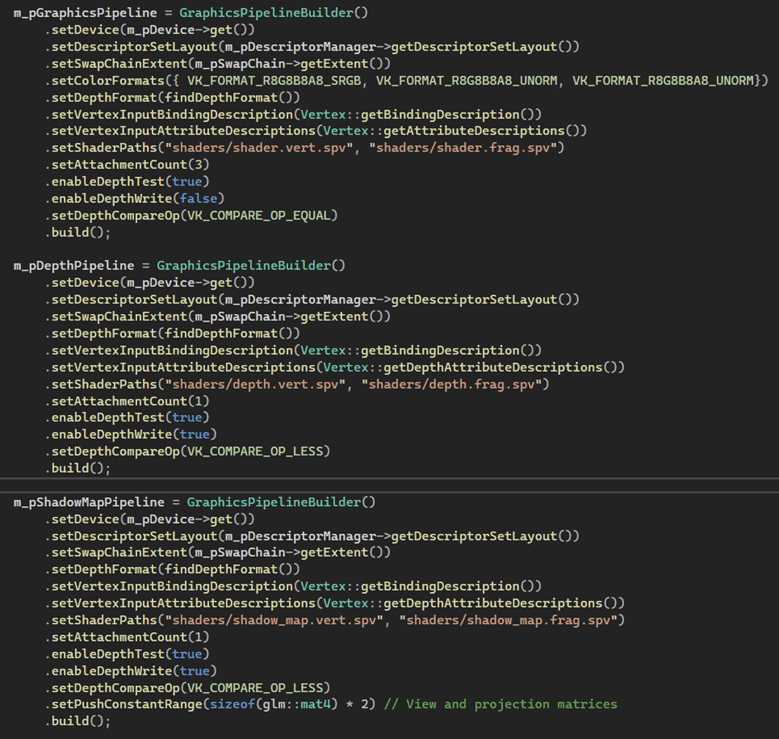
Thanks to the builder pattern, I was able to effortlessly create three distinct graphics pipelines, each serving its own unique setting. This patterns also avoid having a lot of constructor functions with loads of parameters.
Upgrading
When everything was encapsulated and the render class rendered the Sponza scene, I started using new Vulkan features, so I updated the code to use sync2 objects. Instead of using render passes, I started with dynamic rendering where I manually transition between formats.
Deferred shading
I started with making my GBuffer where I save 4 different textures: Depth, Normals, Metallic-Roughness, Material. For the depth I did a depth prepass then I render the normals, metallic-roughness and materials to then combine them in a lighting pass. Then I do a ACES tone mapping using compute shaders.


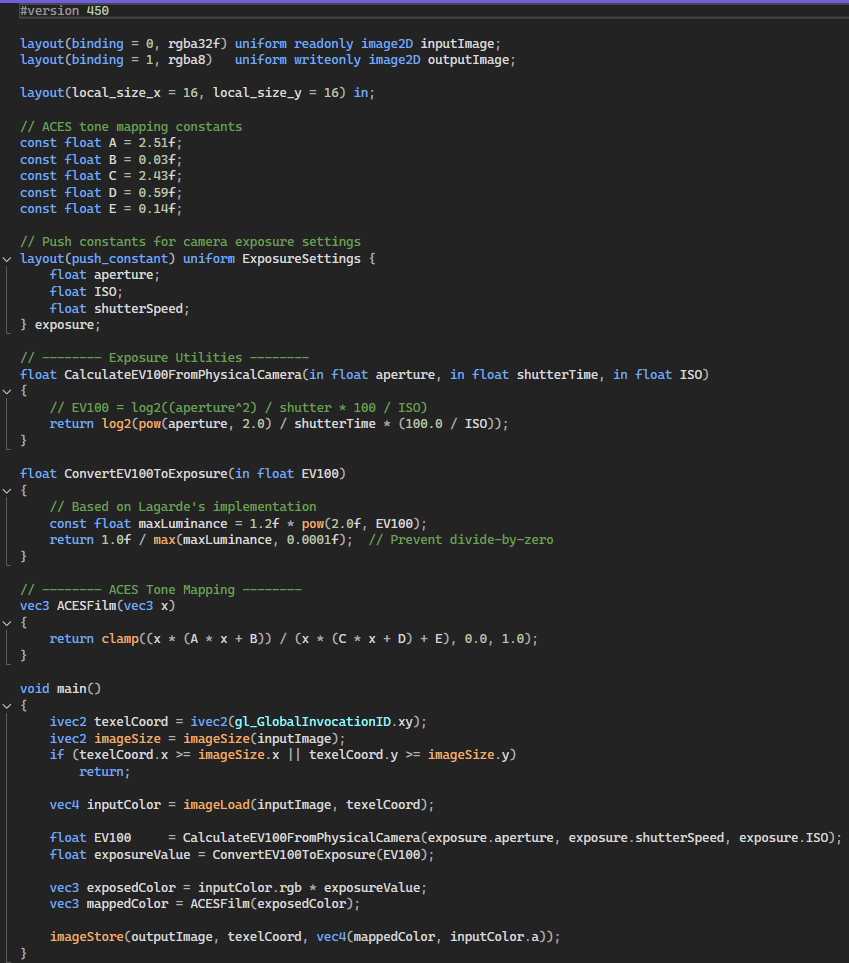
Tone Mapping and Exposure
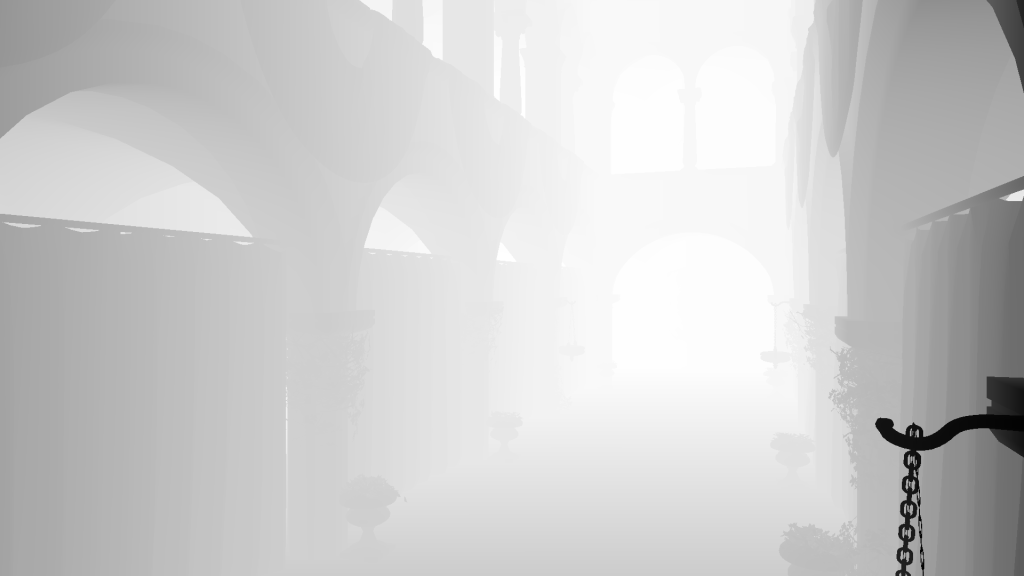
For the tone mapping and exposure I used a compute shader that uses push constants to know the camera settings.
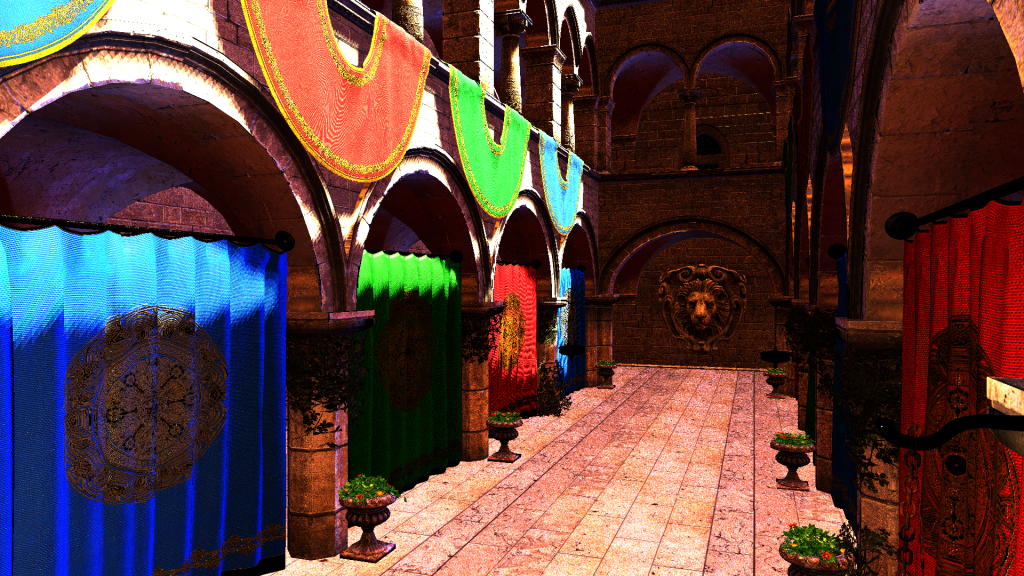
This is the before and after for the compute shader.

Shadow Mapping
I did shadow mapping for directional light at the start of the program because the directional light is static.

Skybox
I rendered a cubemap using an HDRI from polyhaven. I then used that cubemap to render to the pixels where the depth is greater than 1. I used that cubemap to render a irradiance cubemap that I use in the lighting pass as ambient lighting.
Result
Conclusion
While working on this project, I gained valuable insights into Vulkan and rendering in general. It has reinforced my passion for graphics programming, as I thoroughly enjoyed the journey and realized that there are still a LOT of things to learn in this branch of programming. With how the project currently stands, there are still a lot of problems such as the shadow map and irradiance cubemap being incorrect. The code is also not optimally efficient, and I probably did some unnecessary things. But finally, I’m happy with the results I got.
I’m looking forward to my next graphics programming projects, where I will learn new and interesting techniques.
